The project: Create custom boxes for infant and toddler shoes.
The scope: 20 pairs of shoes, ultimately rehoused into 7 custom boxes.
The patterns: 2 piece box and lid, with a drop front and a windowed lid.
In the summer of 2023, I led a small-scale intensive rehousing project for some baby and toddler shoes in the Historical Museum at Fort Missoula's collection. My curator and I had been wanting to give our summer interns a training experience in creating custom boxes. Because their internship project centered around our garment collection, a shoe-focused rehousing training seemed like just the thing. We found a collection in our textile storage that needed to be rehoused and set about determining what type of housing would make the most sense.
After doing some research into how other institutions had rehoused shoes, particularly soft shoes like slippers and moccasins, I found two examples that spoke to us: [insert examples]. We decided to combine the two approaches and create custom drop-front crates with divided trays. These trays would have twill tape loops on the front to help them slide out easily, and they would be lined with [fabric] batting to give the shoes cushioning and help keep them from sliding around as the boxes were moved. The box lids would have windows cut out so that the shoes inside could be seen without having to take the lid off or remove the shoes from the box completely.
I created a box mockup out of some scrap paper to make sure I understood the pattern and wrote out step by step illustrated instructions to help guide them through the process. Each of our two interns created two boxes, one with a divided tray to hold four pairs of shoes and one for an individual pair of shoes. I then made three more boxes, following the same steps, to house the rest of the collection. Meanwhile, our curator was creating muslin pouches filled with polyfill, that we used to gently stuff each shoe and coax it into its proper shape. The end result looked fabulous:
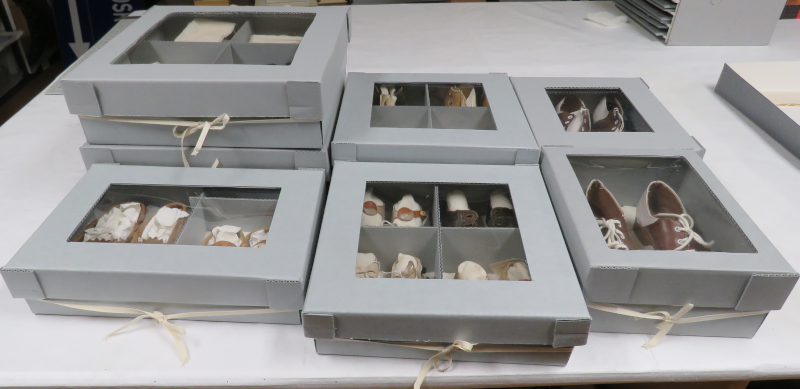
The picture gallery below walks you through the process of making these shoe boxes. For detailed pattern drafting instructions, see the 2 piece box and lid pattern page.

1. These two moccasins will be boxed together in a custom size box with two compartments.
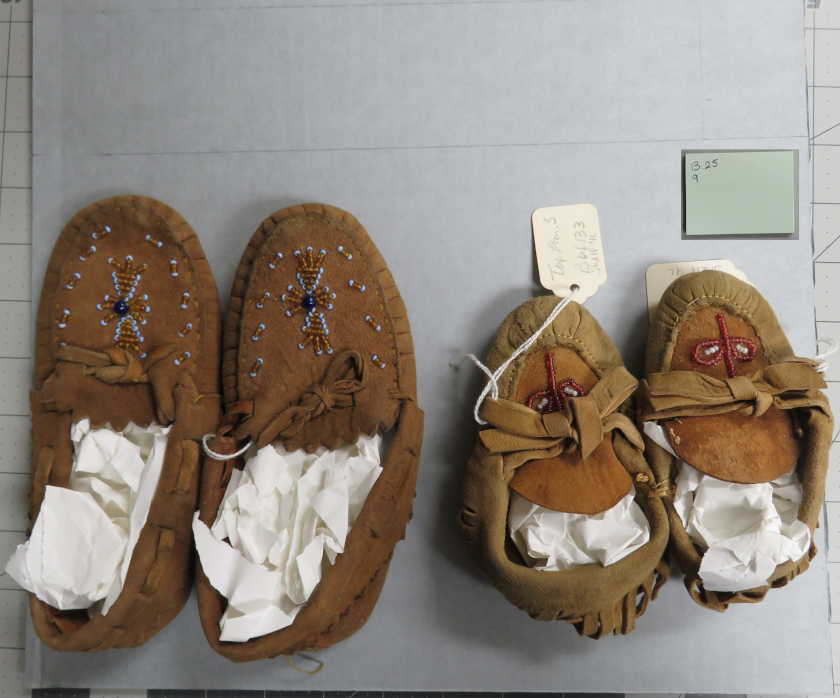
2. After some testing, I created a tray to hold the shoes inside the box. Its final dimensions were 13.25 inches by 9 inches, enough space to fit both shoes comfortably.

3. I drew out my pattern for the box base. I decided on a box height of three inches, and used the tray measurements of 13.25 inches by 9 inches. (I should have made the box dimensions just a tiny big bigger than the tray. I ended up having to shave a little bit off the tray so it fit in easily.)

4. Once my pattern was drawn and finalized, I cut and folded it into its final shape.

5. To put in the twill tape ties that will hold up the drop front, I marked space for holes in both side walls, about an inch from the edge. I used an awl to poke holes in the blueboard.

6. Time to put it together! I use [archival glue] as adhesive and binder clips to hold the box in shape until the glue dries.
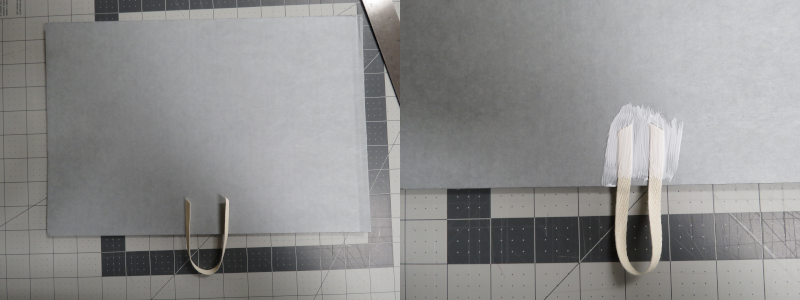
7. While I had the glue out, I went ahead and cut and attached the twill tape loop to the front of the tray. I lay the twill tape down on the blueboard and saturate it with glue until it holds.
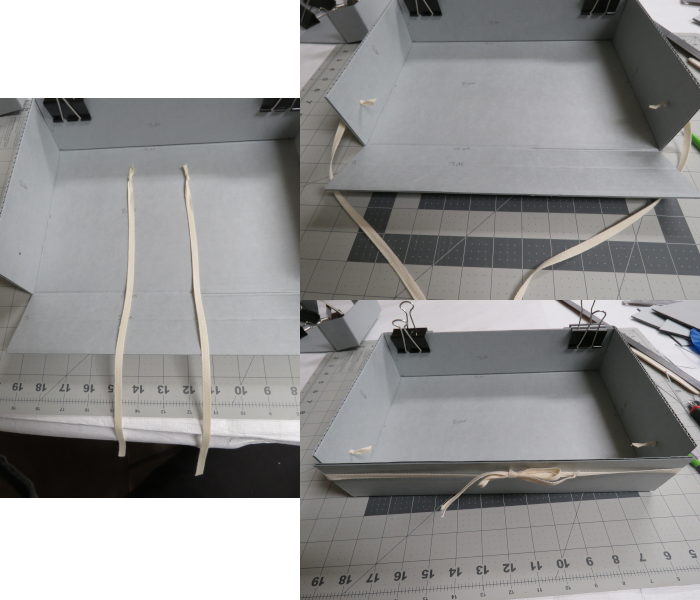
8. I cut out two twill tape ties to hold the drop front up. I put a knot at one end of each tie and threaded the other end through the holes in the side of the box with the knots on the inside.

9. The lid pattern is drawn in the same way as the box pattern. To make sure the lid fit over the box, I measured the dimensions of the completed box base and added a little bit extra. The measurements of the box lid were 13.75 inches by 9.5 inches, with a 1.75 inch lid depth. All four corners of the lid got adjusted for blueboard thickness, and I drew a window in the center of the lid, 2 inches in from the edge on all four sides.

10. Once the pattern was drawn, it was time to cut, fold, and glue the lid into shape.

11. After the glue dried, it was the moment of truth. I took off all the clamps and made sure all the pieces fit together. Nailed it!
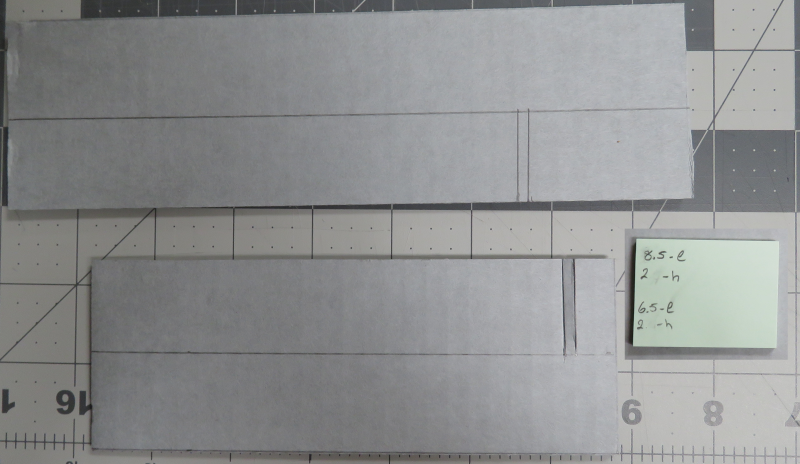
12. Time for the inside. I wanted one compartment for each shoe, but a single divider would have trouble staying upright. So I made dividers for two uneven compartments so that the smaller shoes wouldn't have too much extra space. I created notches in each of the divider so that they slide together nicely. Each notch extends halfway down.

13. Here are the shoes on the tray with the dividers in place. I cut out some batting as cushioning. With the shoes safely elsewhere, I used hot glue to attach the dividers and the batting to the tray.
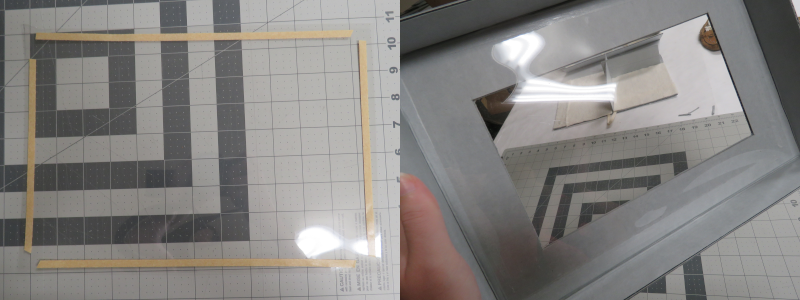
14. The final step is to install the window in the lid. I cut out a piece of mylar larger than the hole and used four strips of double sided tape to adhere the mylar to the inside of the lid.
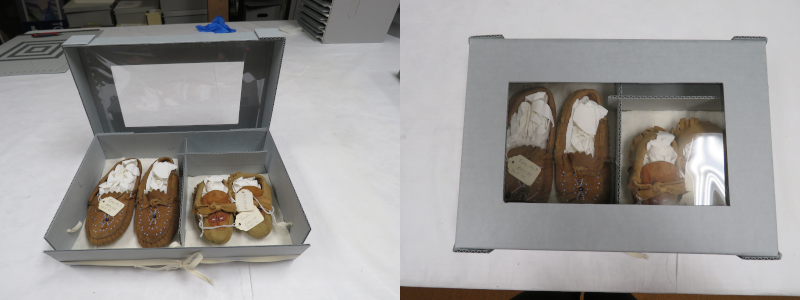
15. And the project is complete! One custom box with a divided tray to hold two pairs of shoes. The moccasins are a lot happier in their new home and so are we!


