Standard blueboard box and lid

Precision rating: low

Materials needed:

Box base

Preparation

  1. Measure object(s) to be housed. Capture length, width, and height.
  2. Decide how much extra wiggle room you want in the box for padding, ease of retrieval, etc. Add that to your measurements.

Drafting the pattern

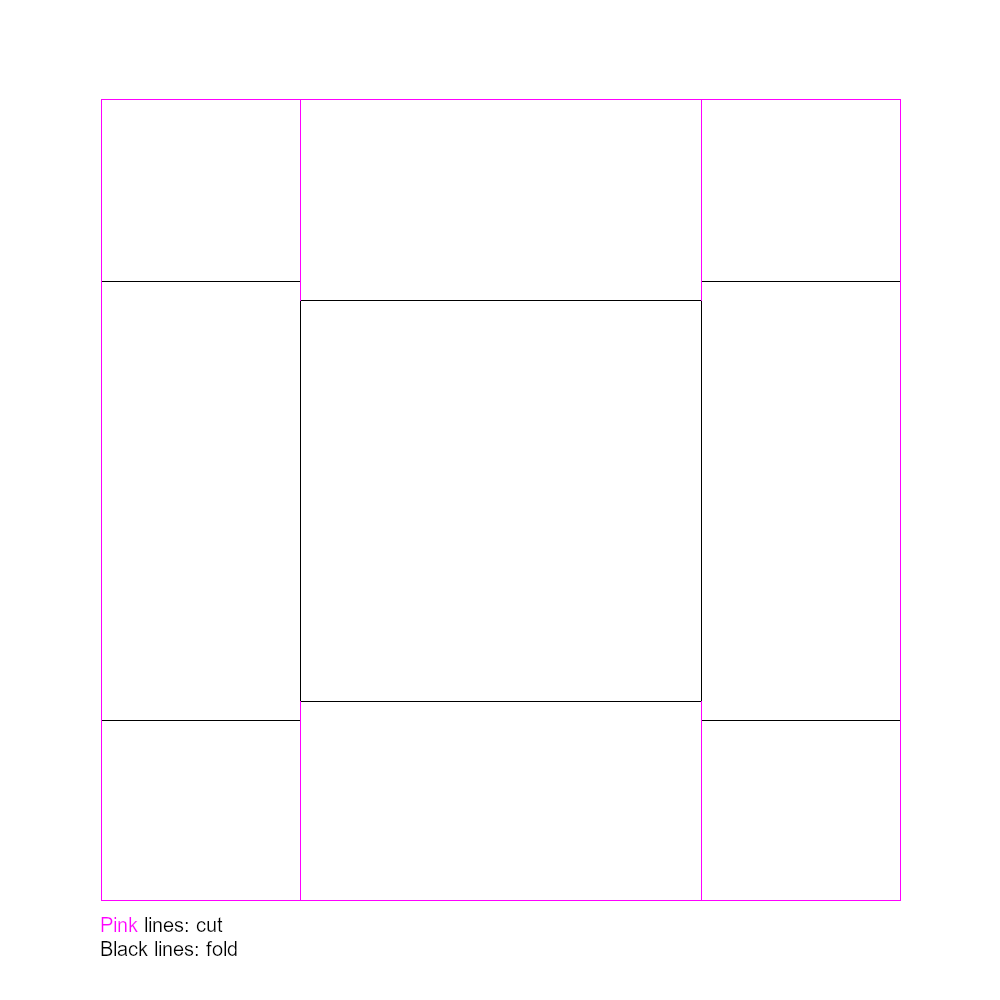
This pattern starts at the bottom left corner of the piece of blueboard

  1. From the corner measure horizontally and make a mark at the desired box height. This is point a.
  2. From point a, measure horizontally the length of the desired box and make a mark. This is point b.
  3. From point b, measure horizontally the desired box height. This is point c.
  4. Returning once more to the starting corner, measure vertically and make a mark at the desired box height. This is point d.
  5. From point d, measure vertically the width of the box and make a mark. This is point e.
  6. From point e, measure vertically the desired box height and makr a mark. This is point f.
  7. Draw a line from each point perpendicular to the edge. That is, points a, b, and c will have vertical lines drawn and points d, e, and f will have horizontal lines. The end shape will be small rectangle inside of a larger one, with squares at each of the corners.
Box base pattern created by following the pattern instructions to the left. It is a large square with 9 smaller squares inside of it.

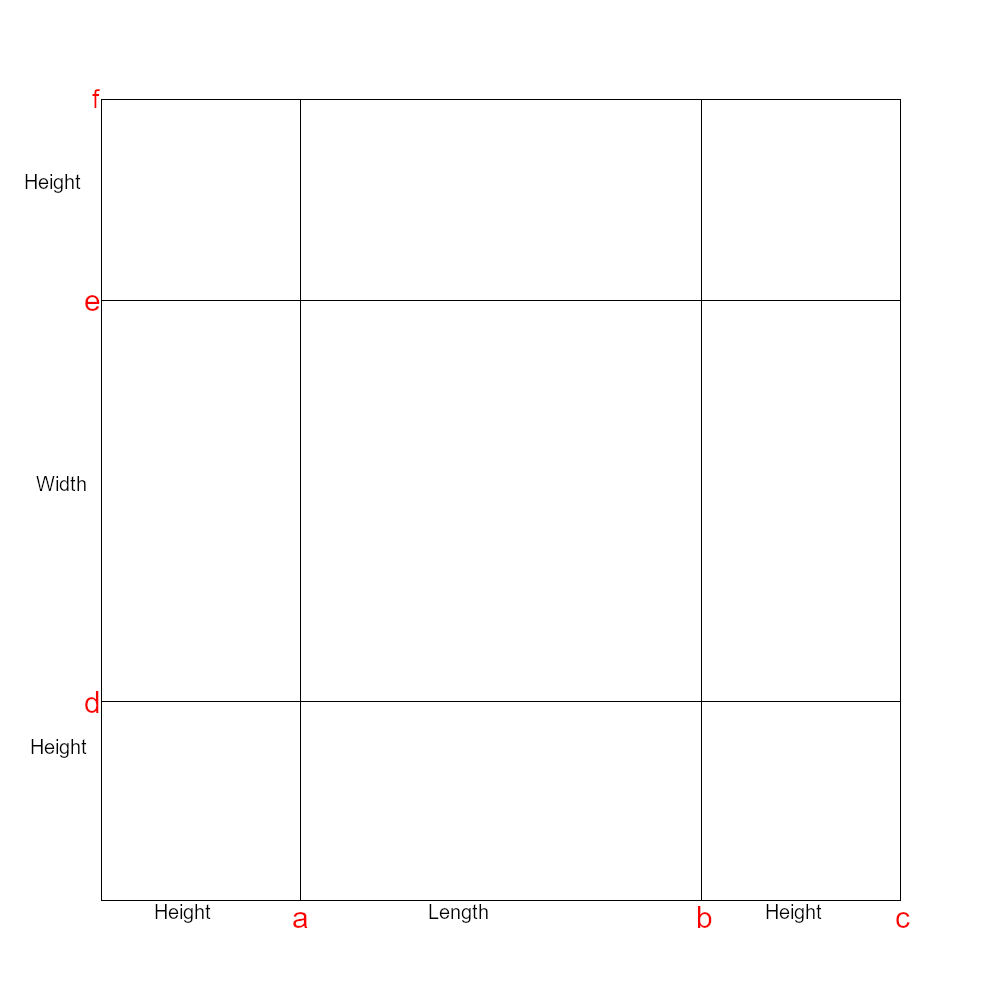
This pattern is drawn so that the corners adhere to the outside of the box. As a result, the corner flaps will be adjusted slightly to account for the thickness of the blueboard.
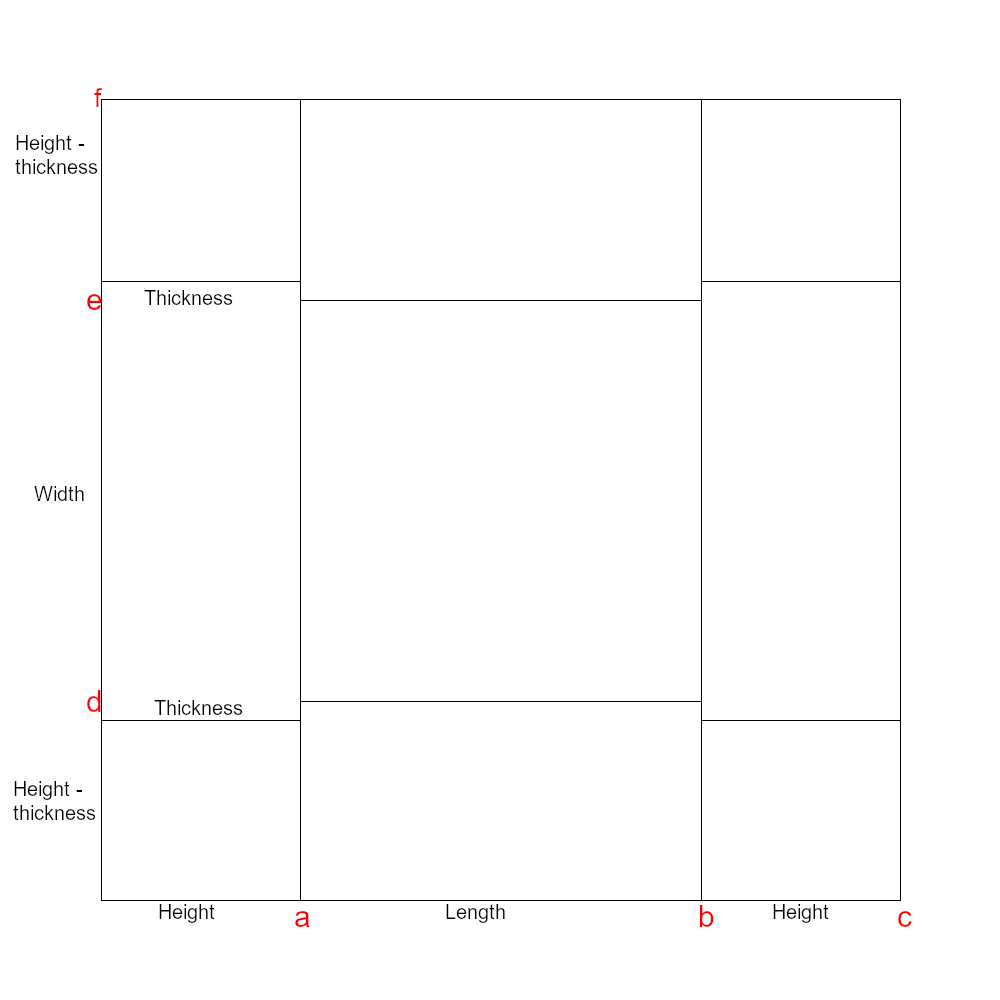
  1. Begin at the bottom left corner. Find the intersection of lines a and d.
  2. Measure down from the intersection along line a. Make a mark at the blueboard thickness measurement.
  3. Adjust line d so that it matches the new mark. Only adjust the line between the edge of the blueboard and the intersection with line a.
  4. Do the same for the bottom right corner. This is the square formed by the intersection of line b and line d.
  5. You will once again be adjusting line d between the intersection with line b and the right edge of the pattern.
  6. Moving to the top of the pattern, find the top right corner, created by the intersections of line a and line e.
  7. Adjust line e towards line f by the thickness of the blueboard.
  8. Do the same for the top right corner, formed by the intersection of lines b and e.
Altered box pattern after following the steps to adjust the corner flaps.

Creating the box

  1. Cut out the outline of the box and the non-adjusted edge of each corner flap.
  2. Using the bone folder, score the outline of the square at the center of box base and the adjusted edge of each corner flap.
  3. In the diagram, the lines to be cut are colored red and the lines to be folded are colored black.
  4. Fold all the creases inward all the way to help the final box keep its shape.
  5. Glue corner flaps to the outside of the box. Use clamps to hold flaps in place until glue dries.
Color coded box pattern showing cutting lines and folding lines.

Lid

Making the lid is identical to making the box base. The only difference will be the measurements: your lid will be slightly longer and wider than the box base, so that it fits on top, and the sides will (usually) be shorter than the full height of the box base. Use these tips to measure needed box lid dimensions, then follow the steps for making the box base using your new dimensions.

  1. Measure outer length and width of finished box base at the widest points.
  2. Add roughly 1/4 inch (roughly 5mm) extra to each dimension so the lid comes off easily.
  3. Decide on the depth of the lid. It should be between 1 inch (roughly 2.5cm) and half the height of the box.

Variants

Drop front

When making the box base, choose one side to be the front. Do not adjust the corner flaps on either side of the front. During the cutting step, cut off both corner flaps adjacent to this side. Adjust and adhere the other two corner flaps as usual.

Open corners

Do not adjust any of the corner flaps. When cutting out the box base, cut off all four flaps. This box base is held up by its lid. Allows for contents to be fully slid in and out.
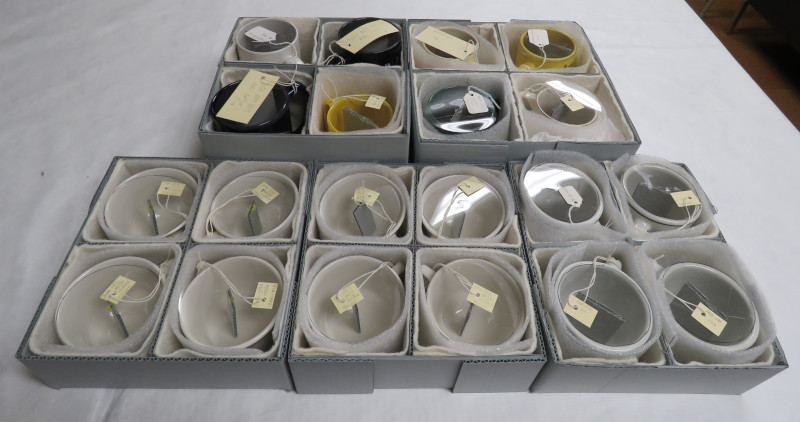
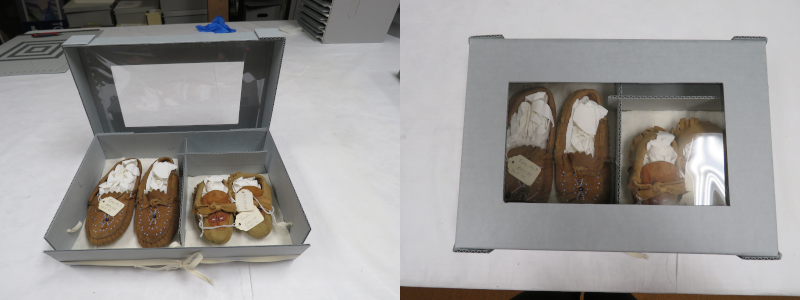
Windowed lid

Before glueing the lid together, draw and cut out a rectangle in the center of the lid’s top. Cut a piece of clear mylar to be larger than the hole. Attach it to the inside of the box lid using an archivally rated adhesive (I like thin strips of double sided tape). Finish box lid as usual.

Example projects