Precision rating: medium
Materials needed:
- Flat sheet of blueboard
- Ruler
- Pencil
- Eraser
- Bone folder
- Box cutter
- Cutting mat
- Strong, archivally rated adhesive
- Clamps to hold the box in shape as the adhesive dries
Preparations
- Measure object(s) to be housed. Capture length, width, and height.
- Decide how much extra wiggle room you want in the box for padding, ease of retrieval, etc. Add that to your measurements.
Drawing the pattern
This pattern is drawn starting in the bottom left corner of the blueboard. The box base is on the left half of the pattern and the box lid is on the right.
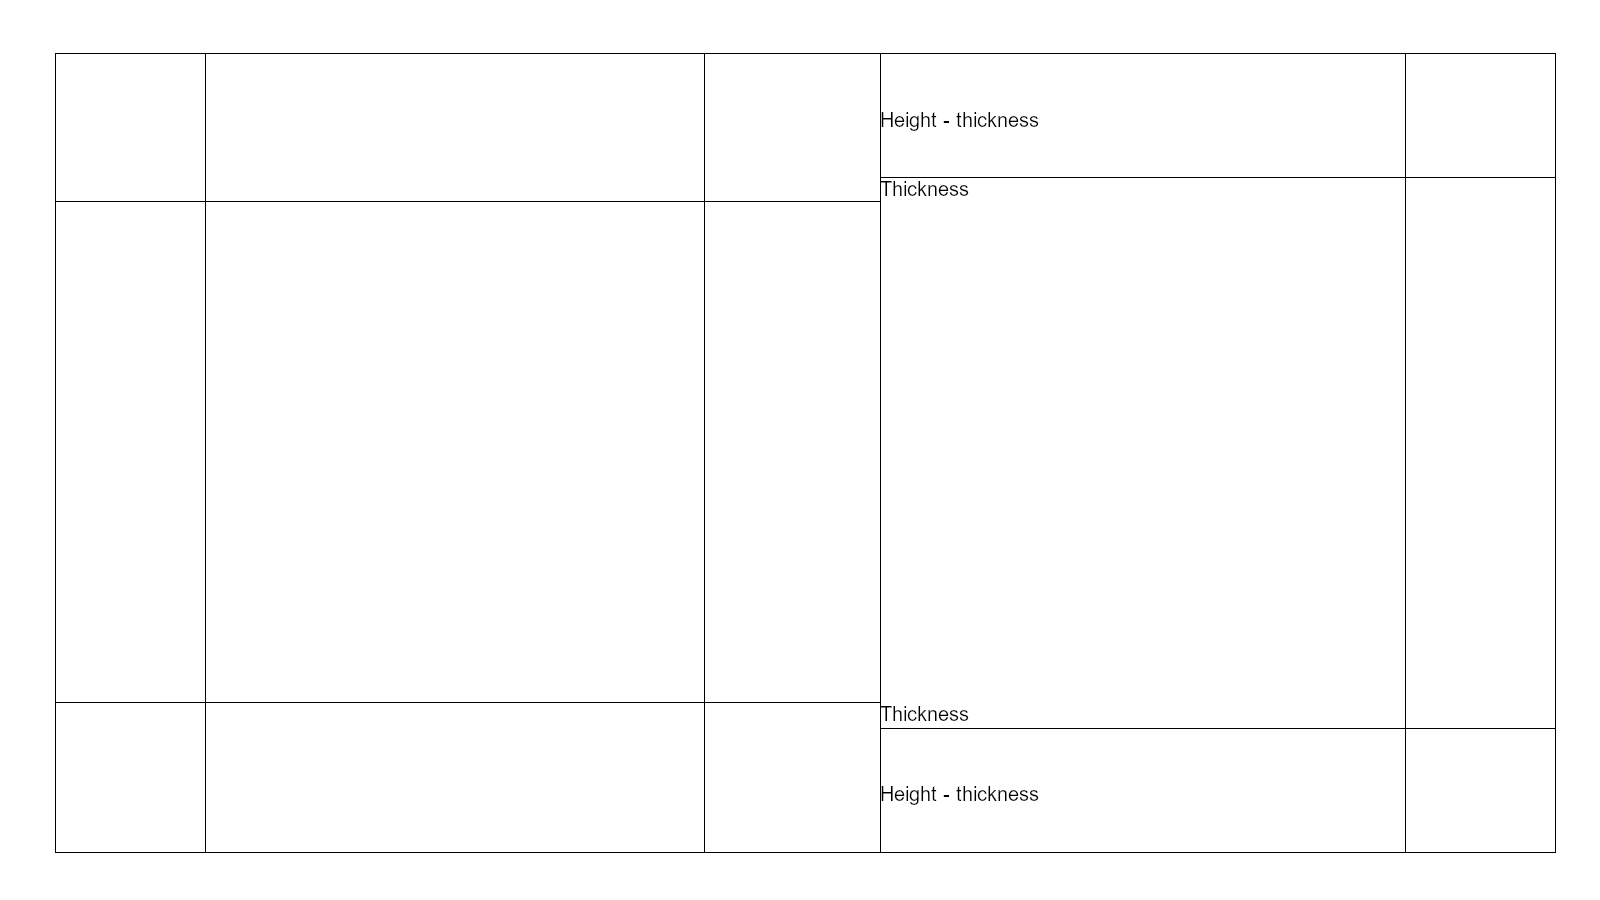
- From the corner measure horizontally and make a mark at the desired box height. This is point a.
- From point a, measure horizontally the length of the desired box and make a mark. This is point b.
- From point b, measure horizontally the desired box height. Add the thickness of the blueboard being used and make a mark. This is point c.
- From point c, measure horizontally the length of the desired box. Add twice the thickness of the blueboard being used and make a mark. This is point d.
- From point d, measure horizontally the desired lid height and make a mark. This is point e.
- Returning to the starting corner, measure vertically and make a mark at the desired box height. This is point f.
- From point d, measure vertically the width of the box and make a mark. This is point g.
- From point e, measure vertically the desired box height and make a mark. This is point h.
- Draw a line from each point perpendicular to the edge. That is, points a through e will have vertical lines drawn and points f through h will have horizontal lines.
|

|
Adjust the lid half of the pattern to account for the thickness of the blueboard. This will allow the lid to fit easily over the base.
- Find the intersection of lines c and f.
- Measure towards the edge of the box from line f by the thickness of your blueboard and make a mark.
- Adjust line f to the new mark from the intersection with line c to the intersection with line e.
- Find the intersection of lines c and g.
- Repeat steps 2 and 3 but measuring up towards line h.
|
|
This pattern is designed so that the corner flaps adhere to the outside of the box. The pattern is therefore adjusted a second time to account for the thickness of the board at the corners.
- Begin at the bottom left corner. Find line f.
- Along line f, measure towards the left edge by the thickness of your blueboard. Starting at line f and going towards the bottom, adjust line a to match the new mark.
- Do the same for the top left corner. This is the square formed by the intersection of line g and line a. You will once again be adjusting line a from its intersection with line g to the top edge of the pattern.
- Moving to the right end of the pattern, find the intersection of lines f and d.
- Along line f, measure towards the right edge by the thickness of your blueboard. Starting at line f and going towards the bottom, adjust line d to match the new mark.
- Do the same for the top right corner, formed by the intersection of lines g and d.
|

|
- Cut out the outline of the box and the non-adjusted edge of each corner flap.
- Cut out the center flaps between the box length and the lid length on both the top and bottom edges.
- Using the bone folder, score the outline of the box base and the adjusted edge of each corner flap.
- In the image below, the lines to be cut are in pink and the lines to be folded are in black:
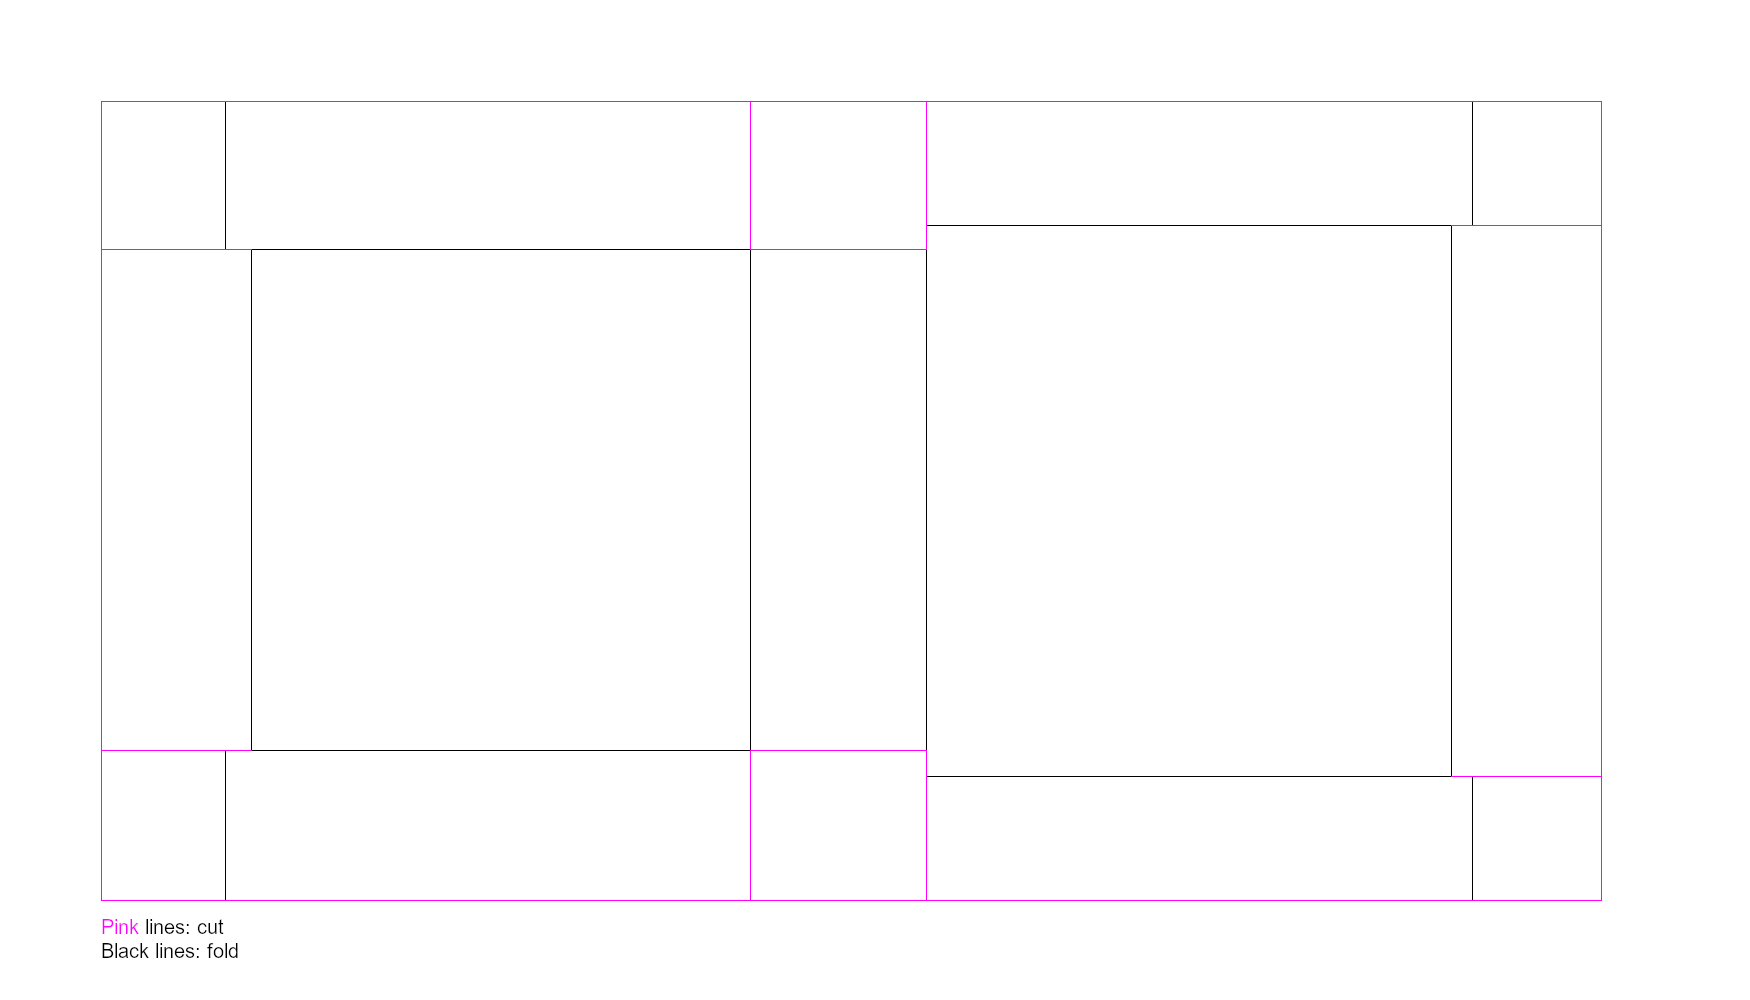
- Fold all the creases inward all the way to help the final box keep its shape.
- Glue corner flaps to the outside of the box. Use clamps to hold flaps in place until glue dries.