Precision rating: low
Materials needed
- Cardstock
- Ruler
- Pencil
- Scissors or box cutter
- Double sided tape or other medium strength adhesive
- Velcro dots
Optional materials
- Eraser
- Bone folder
- Cutting mat (if using box cutter)
- Weights (if using rolled cardstock)
Preparation
- Measure object to be housed. Include length, width, and height.
- Determine desired length of the front flaps. The two flaps need to overlap in the center, so each flap must be more than half the total width of the object.
- Determine the desired height of the bottom front flap.
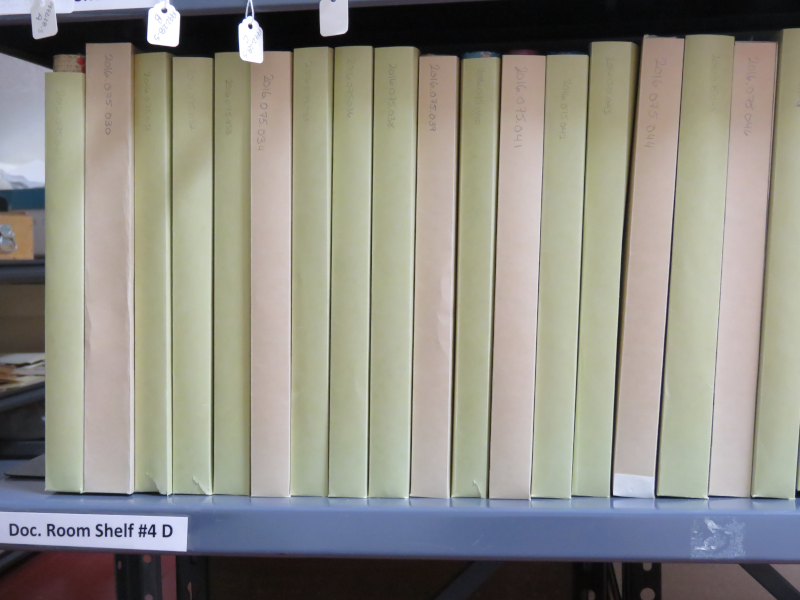
Drafting the pattern
This pattern starts in the bottom left corner of the cardstock piece.
- From the corner, measure horizontally the length of one front flap and make a mark. This is point a.
- From point a, measure horizontally the width of the object and make a mark. This is point b.
- From point b, measure horizontally the length of the object and make a mark. This is point c.
- From point c, measure horizontally the width of the object and make a mark. This is point d.
- From point d, measure horizontally the length of the second front flap and make a mark. This is point e.
- Returning to the bottom left corner, measure verically the height of the bottom front flap and make a mark. This is point f.
- From point f, measure vertically the width of the object and make a mark. This is point g.
- From point g, measure vertically the height of the object and make a mark. This is point h.
- Draw a line from each point perpendicular to the edge. That is, points a through e will have vertical lines drawn and points f through h will have horizontal lines.
|
|
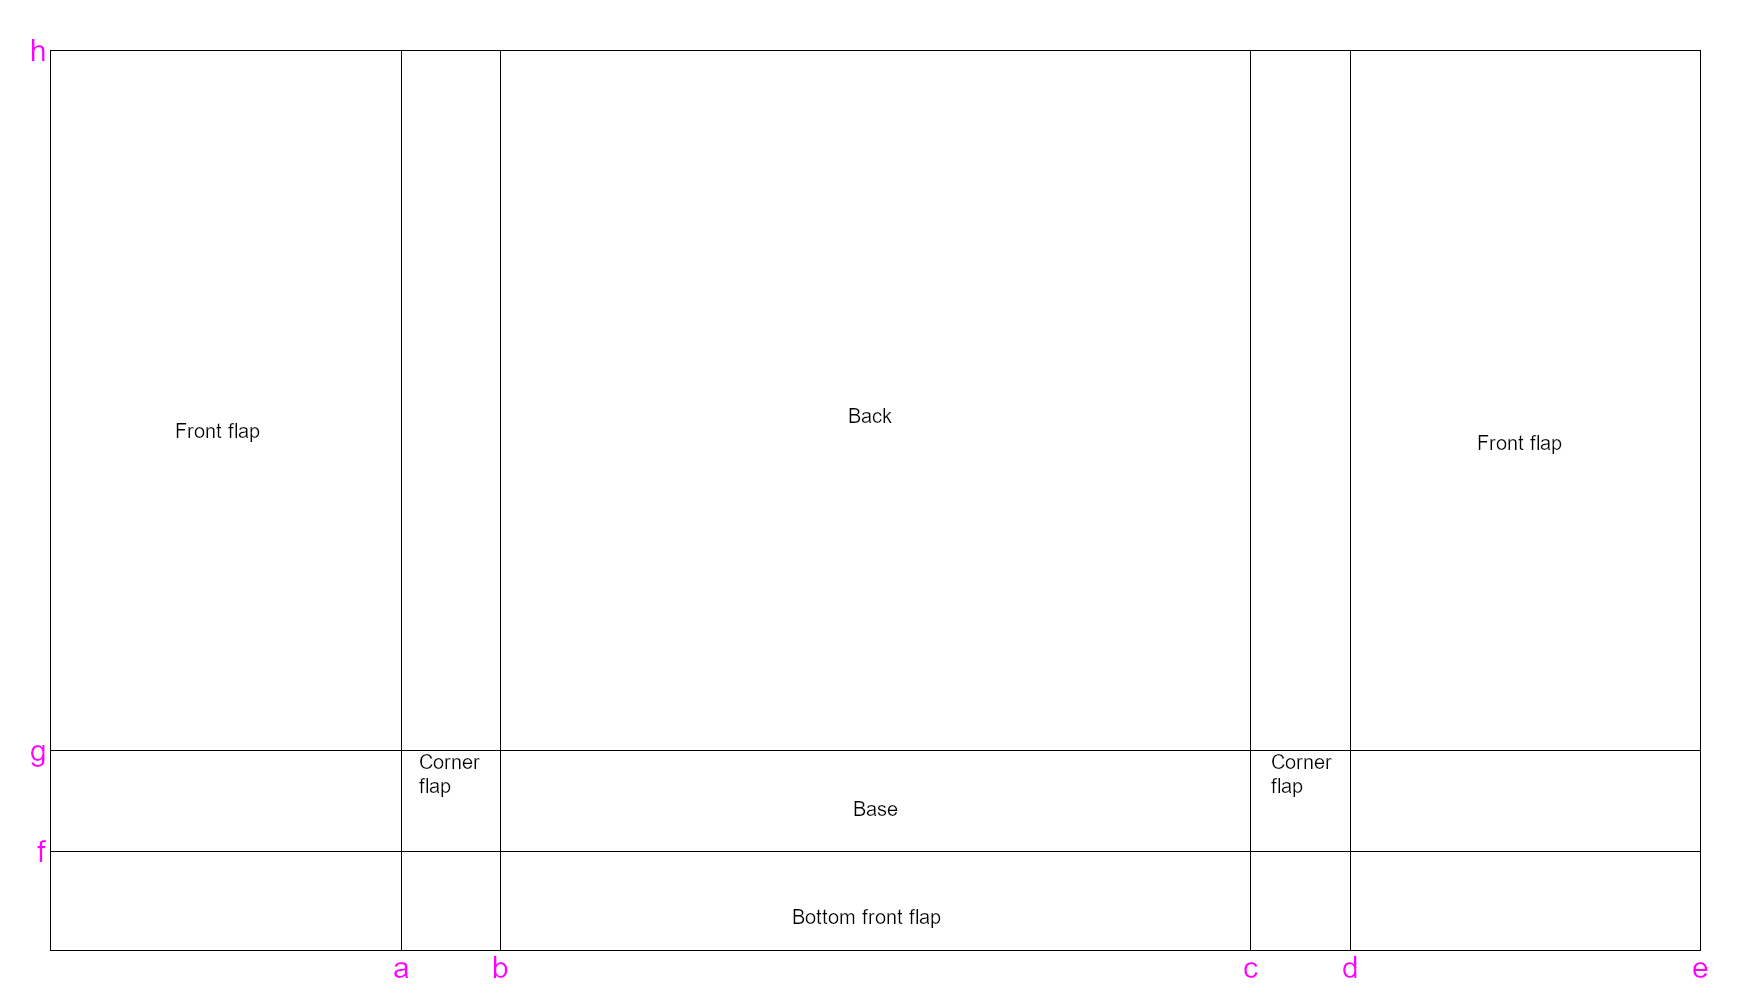
Optional step: Erase line f except between the points where it intersects with lines b and c.
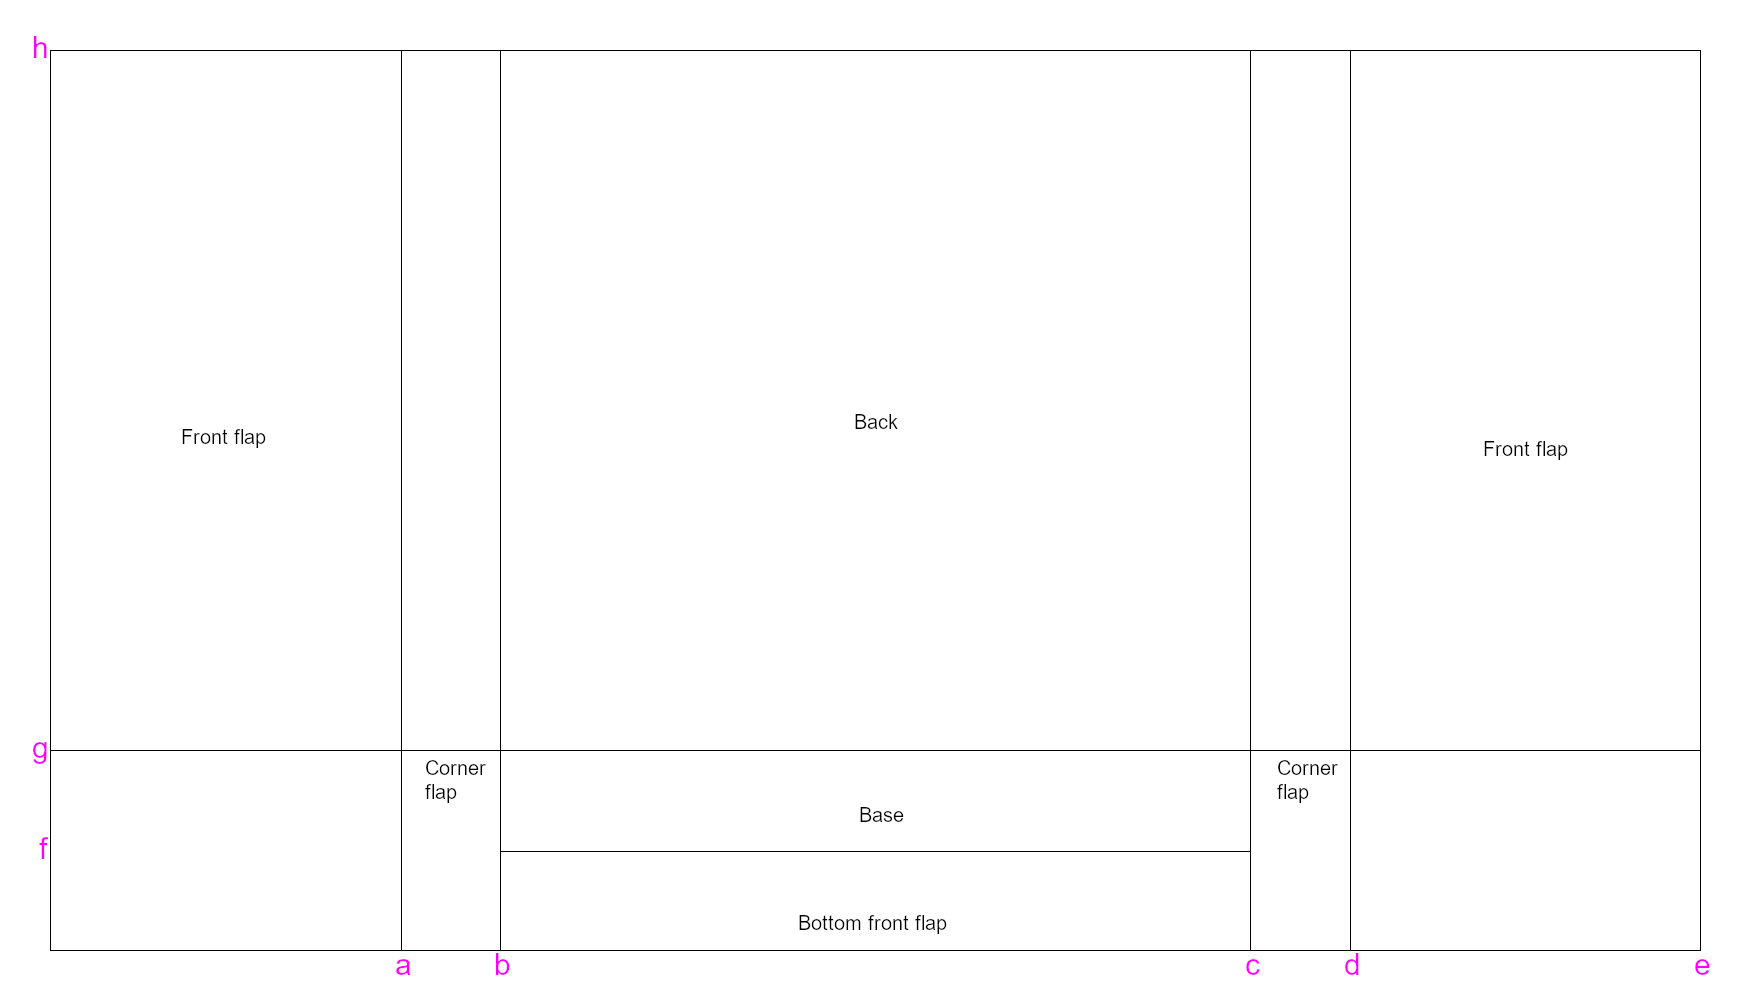
Creating the enclosure
- Cut out the outline of the enclosure.
- Cut out the rectangles formed by the intersection of lines g and a and the intersection of lines d and e.
- Cut along line b from the bottom edge until it intersects with line g.
- Cut along line c from the bottom edge until it intersects with line g.
- Fold along all of the remaining lines.
- Adhere the corner flaps to the base using glue or double sided tape. It does not matter whether they adhere to the inside or outside of the box, although I prefer to adhere them to the outside.
- Decide which front flap will overlap the other. Adhere velcro dots to both flaps so that the enclosure stays closed.
|
|
Example projects